Creating Your First Slider
Exciting times – you are about to create your first slider with Soliloquy! Here we will go through a general rundown of all of the available things you can do with your slider when creating it. Don’t let the length of this piece scare you – it is super easy to create a new slider with Soliloquy. I’m just listing out all the details so that you can learn everything about Soliloquy on your first try. Let’s get started!
STEP ONE: ADD NEW SLIDER
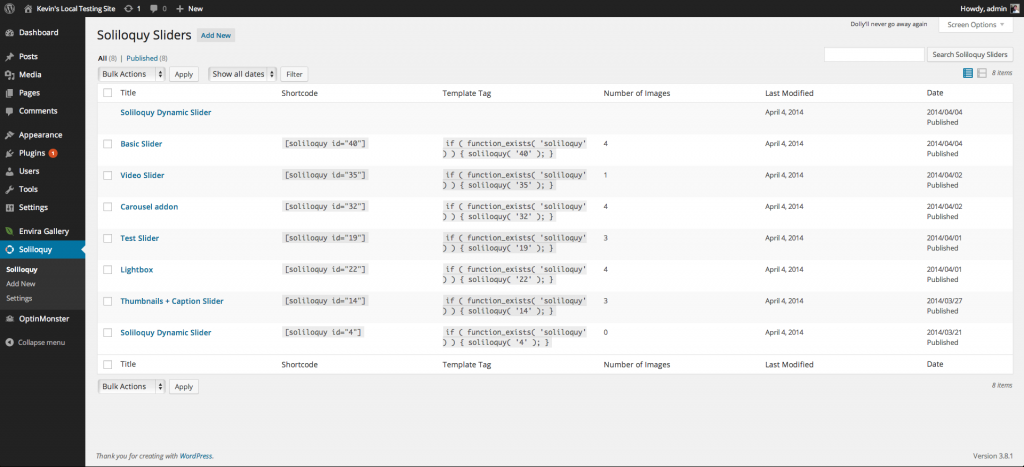
THE MAIN SLIDER PAGE
The main slider table lists out all of the sliders you have created. It lists important information like the slider title, slider shortcode and template tag, and number of images in the slider amongst other things. You can also view the contextual help tab at the top of the page if you need any extra explanation for anything you may see on the screen.
Now that we have been familiarized with the main screen, let’s create our first slider!
CREATING YOUR FIRST SLIDER
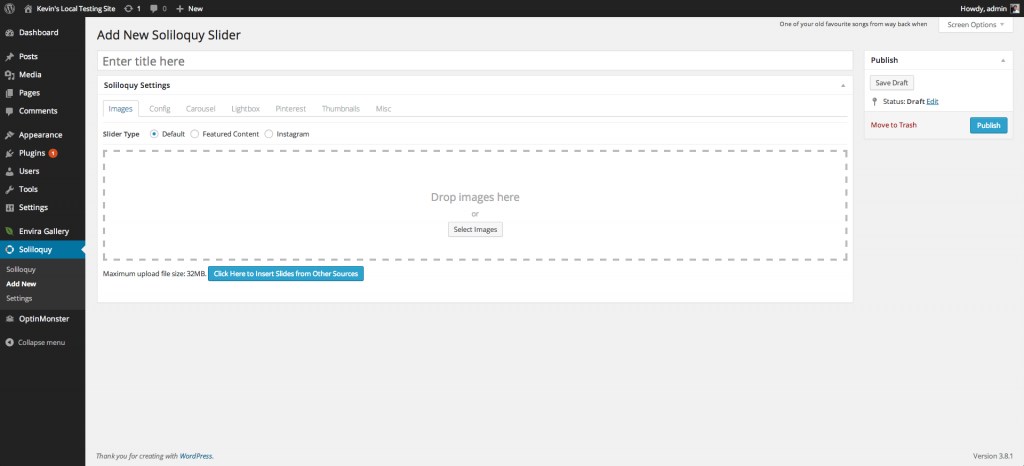
To begin creating your first slider, click Add New at the top of your Soliloquy Home Screen.
Which brings you to the following screen.
The first thing you want to do is give your slider a title, such as “Creating Your First Slider“. Once you have set your title, let’s start uploading some images! Select the Click Here to Insert Slides from Other Sources button to get started. A lightbox display will open that will allow you to insert images from your Media Library. If you need to add images to your Media Library first, click the Select Images button or drag and drop your images into the image upload box.
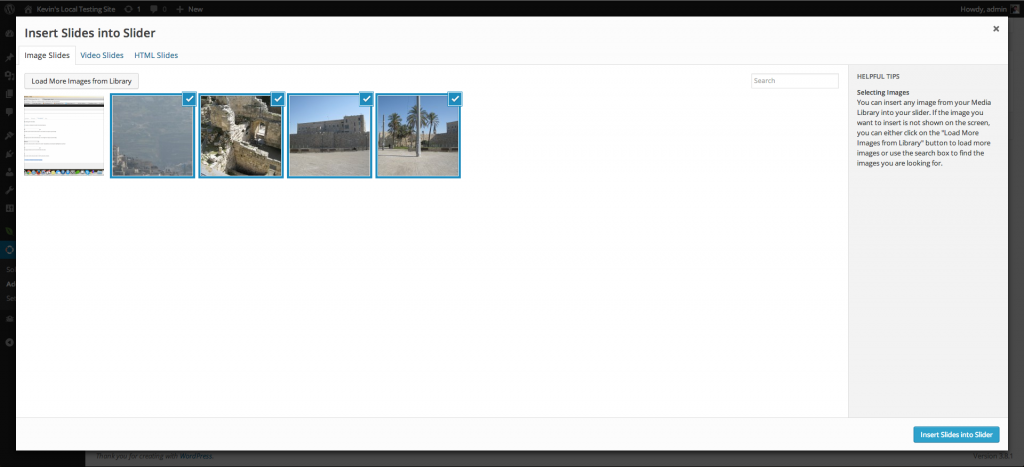
Have fun during this time. Once your images are uploaded, you can click on the Insert Slides into Slider button. Now, you screen should look similar to the screenshot below.

From this screen, hover over the images. You will notice that you can drag and drop them in order. Simply click and drag an image to a different location to sort your slides. The slide order will automatically be updated for you.
If you click on the blue Info icon a lightbox will open, allowing you to edit each individual slide’s metadata. Available options in this screen include:
- Title
- Alt Text
- Hyperlink
- Open Link in New Tab?
- Caption (accepts HTML content)
- Load in Lightbox?
- Schedule Slide?
- Start Date
- End Date
- Thumbnail
You can include an alternative thumbnail image by adding it’s URL to the Thumbnail input field, or by pressing the Choose Thumbnail Image button to select an image from your media library.
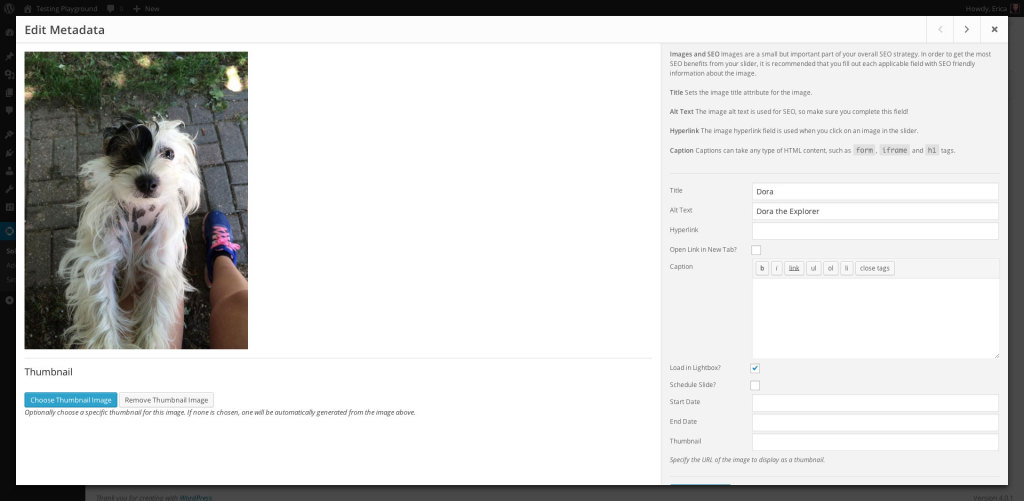
Image captions can accept any type of HTML, including (but not limited to) iframe, h1 andform tags. This gives you the ultimate ability to transform your sliders into anything imaginable. With some HTML and CSS magic, you can make your slider shine above the rest (while keeping it responsive at the same time)!
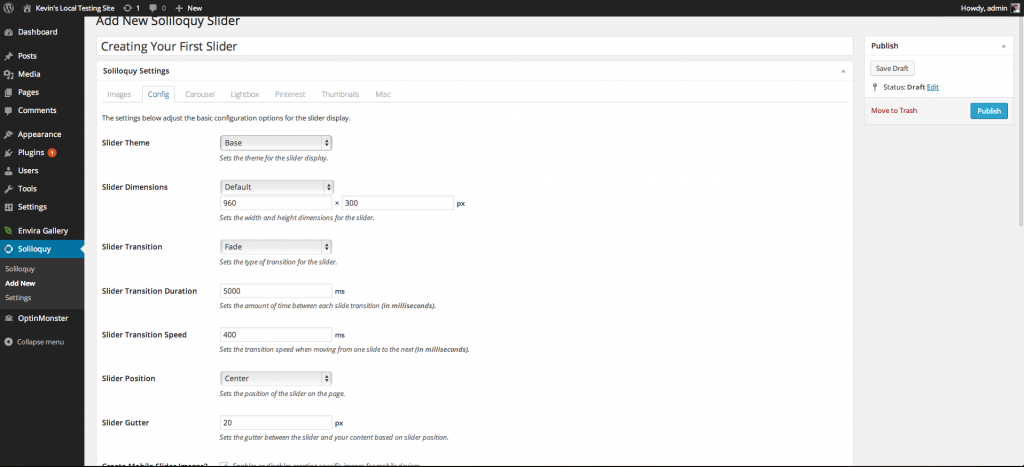
STEP TWO: ADJUSTING SLIDER SETTINGS
Once you have modified your image settings, it’s time to adjust your slider settings. The next menu you will be brought to is the Config menu, like the screenshot below.
STEP THREE: CUSTOMIZE YOUR SLIDER WITH CSS
Soliloquy allows you to customize your slider with CSS. You will notice in the screenshot below, a container where you can input your CSS. It is important to note that the beginning of your CSS coding must begin with the unique slider ID number automatically generated when you created the slider. In the case below, my custom CSS should begin with#soliloquy-container-46 {"Your custom CSS here";}. Go ahead and add any custom CSS you desire!

STEP FOUR: PUBLISHING AND USING THE SLIDER
Now that you have gotten a firm grasp on all the options, it’s time to publish your slider. Click on the Publish button to make your slider active, and then visit a post or page edit screen.
At the top of the editor, you will find a button that says “Add Slider”. Click on that button to bring up a lightbox where you can select to insert a slider into your post or page. Once you have chosen the one you created (“Creating Your First Slider” if you have followed this tutorial all the way through), click on the button to insert the slider. Save your post or page and check out your updated site!