In this article, we’ll cover some usage examples of how you can utilize Essential Grid within your site. We’ll mainly be focusing on how to use Essential Grid and so may skip over some finer details.
Note: This article covers only a small portion of what you can achieve with Essential Grid, make sure you take a look at the official documentation which is linked to in the Documentation section below to explore the full possibilities of this powerful tool.
Getting Started
Make sure you already have Essential Grid installed and then in your wp-admin, you should see the Essential Grid menu item like this:

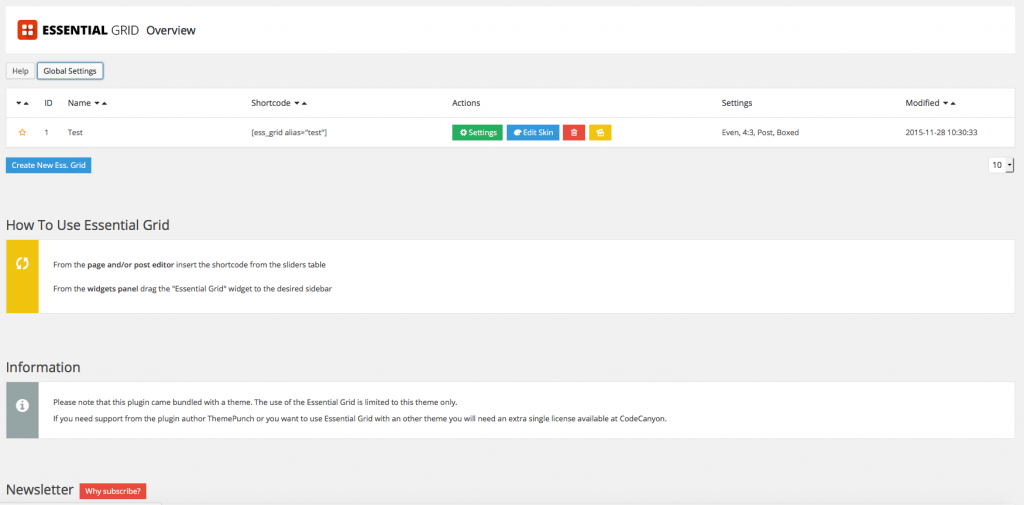
Go ahead and click on “Ess. Grid”, once you’ve clicked that, you’ll see the Essential Grid main admin screen like this:
Documentation
As we mentioned further up, we’re only going to cover how to use Essential Grid and not every option it provides, to learn more about Essential Grid check out the official documentation here.
Use Cases for Essential Grid
Essential Grid is a extremely versatile plugin, you can use custom post types, custom taxonomy, categories, tags, posts, pages, media etc. Making multiple use cases for it, including but not limited to:
- Custom Product showcases. Use Essential Grids custom post type feature to show off products from different categories on different pages, perfect to keep the focus on one set of products, rather than having a overall shop page.
- Custom post pages. Use Essential Grid custom post type feature to show posts from selected categories or with selected tags on different pages, perfect to have a page per category or per taxonomy (category/tag).
- Showcase your products or posts at the end of a product or post with a Essential Grid inserted. Perfect for an upsell or cross promotion.
- Photo Galleries
Using Essential Grid for Galleries
Go ahead and click on “Ess. Grid”, once you’ve clicked that, you’ll see the Essential Grid main admin screen like this:

Click on Settings – that will bring you to the next page with settings like this:
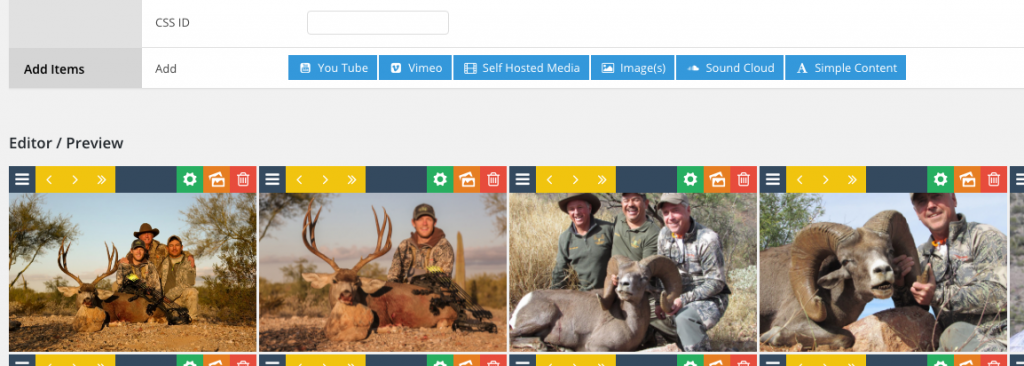
In the Add Items section, click on Image(s) and add images either in bulk or individually. Once you add images to the gallery, you will see the image added to the editor at the bottom of the screen as in the screenshot above. You can then rearrange images using the toolbar at the top of the image itself.
Placing your Grid using Cornerstone
Now we’ve created our grid, it’s time to make use of it! We’re going to add a new page for the purpose of this article, but you can of course use an existing page/post etc. Load up whichever page/post you’d like to place the grid on in Cornerstone.
Once your page has loaded in Cornerstone, add one section, or add a new section to a existing page and then go to Elements. Scroll down the elements list and you’ll see we have a new Essential Grid element:
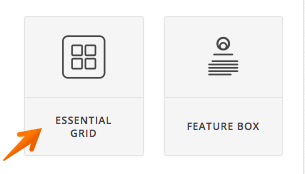
Go ahead and drag and drop that into your newly created section. By default it’ll select the first grid you created, so if you only have one grid it will display fine, if you have created multiple grids, click on the grid in Cornerstone, then on the right hand side, you should see a dropdown select box, click that and then choose your grid from the dropdown:

Once you’ve selected your grid, add any other content you want to your page, such as text images etc and then save in Cornerstone.
Conclusion
Hopefully the information provided above has helped you to gain a better understanding of what to expect from utilizing Essential Grid. Ultimately, there are a few things to take away from this article:
- Essential Grid is a extremely powerful and flexible plugin that will assist you with creating the perfect website.
- The version of Essential Grid included with the theme is an unmodified version of the plugin.
- We do our best to ensure that the version of Essential Grid included is as up-to-date as possible; however, this might not always be the case based on the reasons listed in the “Bundled Version” section above, which includes stability, release cycles, and the fact that not all updates are necessary.
- Any questions concerning the usage of a Essential Grid feature should be directed to the online documentation referenced in the “Documentation” section above.